/media/ic-dental/images/2026/03/2188bd29915a4501983011678565696c.webp)
/media/ic-dental/images/2026/06/What-to-Expect-During-Your-Dental-Implant-Procedure.jpeg)
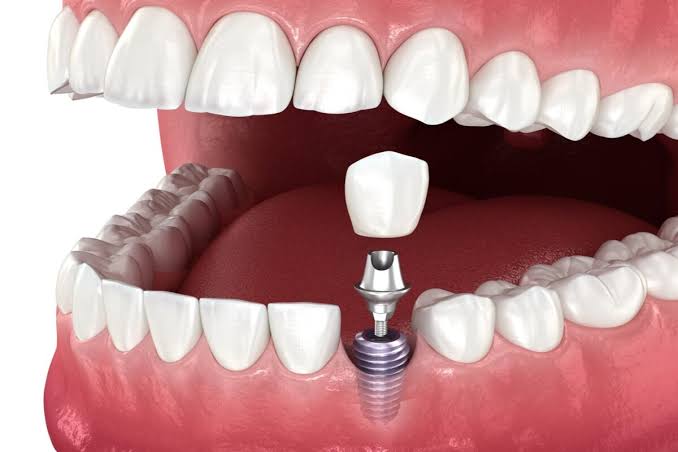
Pre-Surgical Evaluation and Planning
Before the first incision, there's groundwork. Two to four weeks beforehand, during office hours, your dentist or oral surgeon starts with a thorough evaluation, it's the first step in mapping out the entire What to Expect During Your Dental Implant Procedure. This isn't a quick chat. Expect a solid hour for this appointment. We go deeper on this in our guide to a tooth bridge.
You'll get a CBCT scan, a 3D X-ray that takes about 20 seconds. It reveals bone height, width, density, and shows where your nerves and sinuses are. In my experience, about one in five patients find out they need a bone graft right here. That pushes the timeline by three to six months, so it's better to know it now. This overlaps with what we cover in dental implant recovery.
We start with a thorough review of your medical history. Uncontrolled diabetes (heavy smoking)or bisphosphonate use, common in osteoporosis drugs, can all delay healing. Your surgeon also checks for blood thinners (some may need to be paused)but only under a doctor's guidance. Honest communication now prevents complications later.
The treatment plan itself is a blueprint. You'll see the implant brand, like Straumann or Nobel Biocare, the typical size (3.5 to 5.0 mm diameter), and the position. A surgical guide, a 3D-printed plastic template, is often made from your scan data. This guide sits on your remaining teeth and directs the drill path. Guided surgery can knock flaherror rates down by 30-40%.
Sedation options get covered too (local)nitrous, or IV, and they'll walk you through costs. You'll sign a consent form and put down a deposit, most US practices ask for 25-50%, before things move forward, including those in Metairie. Don't forget to line up a ride home, you won't feel like driving after sedation.
That evaluation appointment? Boring, but absolutely priceless. Skip it, and you risk surprises on surgery day.
The Implant Placement Procedure
The day of surgery. Chances are, you're more anxious than you need to be. Most people are nervous.
Before They Start
Your dentist or oral surgeon checks your vitals, confirms the plan, and then takes any last questions about what to expect during your dental implant procedure. If you're getting IV sedation, they start that first. With local anesthetic alone, the injections feel no different from a filling, maybe 15 seconds of a pinch. Either way, the goal is zero discomfort once the work begins. There's more detail in our guide to screwless dental implants.
The Incision and Site Prep
Once you're numb, the surgeon makes a small incision in the gum tissue where the implant will go, beginning the implant stages. The jawbone is exposed by This underneath. Your dentist might use a laser or a scalpel, either one is routine. They gently lift the gum away to get a clear view of the work area. At this stage, all you'll feel is some pressure, and it's not pain. More like someone pressing a finger against your jaw from the inside.
Drilling and Placing the Implant
Now comes the part most people dread: the drilling, and but you won't actually feel it. What you'll hear is a low, steady hum. The surgeon starts narrow and works up through wider drills, cutting a channel precisely where the implant needs to go, advancing the implant process. The channel is measured to the millimeter. Depth, angle, spacing: all planned beforehand from your CT scan.
Then the implant (a small titanium screw about 8 to 12 millimeters long)is threaded into that channel. You might feel a slight turning sensation, as if a bolt is being tightened into a wall. It lasts maybe a minute.
Closing the Site
Once the implant is seated, the surgeon places a healing cap or cover screw on top to protect it while the bone fuses around it. The gum is then stitched back into place. Some surgeons use dissolvable stitches. Others use regular ones that come out in a week or two. Both work fine.
How Long Does the Actual Procedure Take?
A single implant placement runs 60 to 90 minutes from incision to last stitch. More complex cases, multiple implants, bone grafting at the same visit, sinus lifts, can run two to three hours. But the core placement itself is the quick part.
Afterward (you'll sit in recovery for about 20 minutes if you had sedation)or you can walk out immediately with local anesthetic alone. Someone should still drive you home. Keep contact with your dentist for follow-up.
What You'll Notice Right After
Numbness in your lip, cheek, and tongue fades over 3-6 hours.
Mild bleeding from the site is normal, not alarming.
Expect some swelling, it peaks around 48 hours after the procedure.
Healing and Osseointegration
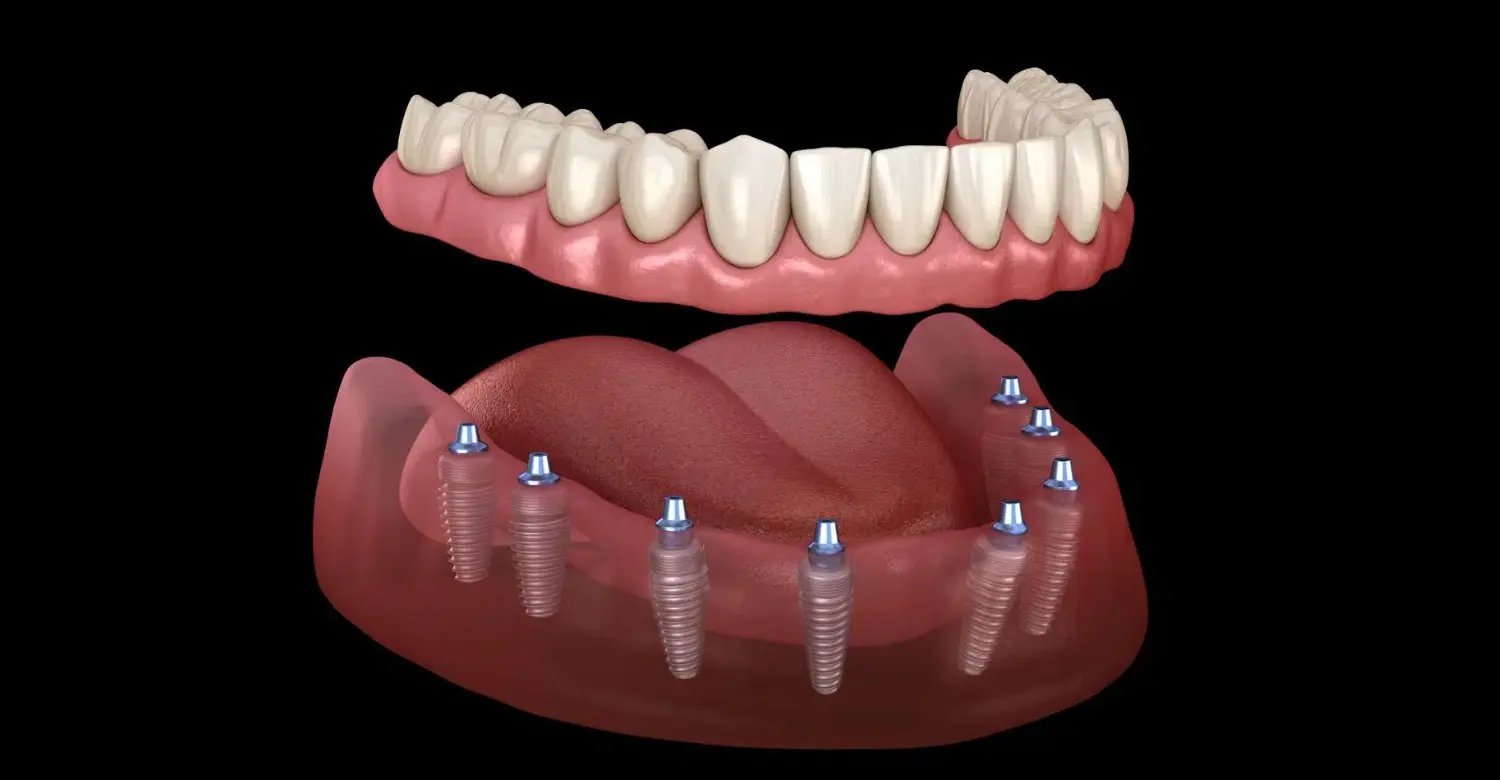
Once the implant is placed, the real work begins, and it's hidden from sight. Inside your jaw, bone cells start crawling onto the titanium surface, fusing with it over the coming months. That bond (called osseointegration)is what makes the implant a permanent root replacement. It doesn't happen overnight. Most patients need three to six months for the bone to lock in tight enough to hold a crown.
What happens inside your jaw
The implant acts as a scaffold. Your body doesn't treat the implant as foreign (that's thanks to titanium's biocompatibility), so osteoblasts, the cells that build bone, attach directly to the surface. New bone fills the microscopic gaps over 6 to 12 weeks. Usually by week 12, the implant is stable enough to handle chewing forces, but your dentist will take an X‑ray to confirm before moving on.
What you'll feel during healing
For the first week or two, you'll likely have soreness at the site, mild swelling in your cheek or gum, and possibly some bruising. That's normal. Pain is manageable with over‑the‑counter ibuprofen or the prescription your dentist provides. What drives people crazy is the soft‑food diet (soups, yogurt, scrambled eggs) for about two weeks. Eating hard or crunchy foods puts torque on the implant while the bone bond is forming. After that (slowly reintroduce normal foods)but chew on the opposite side until the final crown is placed.
Follow‑up visits are part of the deal. Your dentist checks the implant's stability around week 4, week 8, and again before the restorative phase. If bone density was low or you had a sinus lift, the timeline stretches toward the six‑month mark. Smokers and people with untreated gum disease heal slower, sometimes double the average window.
Why you can't rush it
Pushing the timeline because you feel fine is the fastest way to fail the implant. Osseointegration is a biological process, not something you can trick. Miss a follow-up? Infection follows. Crispy foods at week three? That's a microfracture waiting to happen. The whole point of waiting is simple: avoid a loose implant that has to be extracted and started over.
So yes, the healing phase stays quiet, slow, even boring on purpose. And that's exactly what you want. If you show up for check-ups and follow directions, the implant will be ready when the lab ships your crown back-right on schedule, usually.
Restorative Phase: Abutment and Crown Placement
After the implant fully fuses with your jawbone (that's osseointegration)and it typically takes 3 to 6 months, you move into the restorative phase. This is where the visible part of the tooth gets built. Two components come into play: the abutment and the crown.
Think of the abutment as a connector piece. It screws directly into the implant body and sits slightly above the gum line. From there, it holds the crown in place. Placing the abutment usually takes a short visit, around 30 to 45 minutes. Your dentist numbs the area, makes a small incision to expose the implant if it's buried under gum tissue, then attaches the abutment. Certain practices place a healing cap right during implant surgery, that lets them skip the separate abutment step, but it depends on the situation.
Once the abutment is seated, your dentist takes impressions of your mouth. These days, most offices have swapped the goopy trays for digital scanners. The scan goes straight to a lab, and they fabricate your custom crown. Turnaround is typically around 2 to 3 weeks. In the meantime, you'll have on either a temporary crown or a healing cap. That temporary piece keeps the abutment protected and lets you get on with your day as you wait. It's not as strong as the final crown, so keep softer foods to that side for now.
Choosing the Crown Material
Before the lab work kicks off, your dentist will walk through the options with you. PFM crowns are durable-they've been used for decades-but the metal edge can become visible at the gum line over time. Zirconia is popular right now-strong and tooth-colored, plus it's biocompatible. Lithium disilicate-e.max is one example-gives you great aesthetics and sees a lot of use on front teeth. Prices vary. A PFM crown might run $1,500-$2,500 per tooth, while all-ceramic can go $2,000-$3,500. Your insurance policy might pick up part of the tab, but implants are usually considered major restorative work.
What to Expect at the Crown Placement Appointment
The final crown seating-it's straightforward. The dentist removes the temporary, then tries in the new crown. They check the fit and bite. A tiny shave here or there so the crown doesn't hit too hard, that's common enough. Then it gets cemented or screw-retained onto the abutment, and no needles required that day. You walk out with a tooth that works. For a day or two, some patients describe pressure or slight soreness in the gum.
Recovery and Aftercare Following Dental Implants
The first 24 hours after surgery really set the tone for the whole recovery. A little oozing the first day is normal. Keep the gauze in place for 30 to 60 minutes to let the clot set. If bleeding continues after that, try a moist tea bag, fold it and bite down. It's the tannic acid that does the trick.
Swelling usually hits its peak around the second or third day. Use ice packs for the first 48 hours, 20 minutes on, 20 minutes off. After the first couple of days, switch to warm compresses to boost circulation. Stick with the prescribed pain relievers, they're stronger than anything you'd pick up at the pharmacy. Take your first dose before the local anesthetic fully fades.
What to eat (and what to skip)
Stick to soft foods: yogurt, smoothies, mashed potatoes, lukewarm soup, and avoid anything hot, heat dislodges the clot. No straws for at least a week. The suction can pull the clot out, leading to a dry socket. That dry socket hurts worse than the surgery.
Oral hygiene during healing
On day one, don't brush near the implant site at all. Starting day two, rinse gently with salt water after meals, not vigorously. Brush normally everywhere else, but use a soft-bristle brush around the healing area. You'll receive a prescription mouthwash from your dentist, use it exactly as directed.
Activity and rest
For the first 48 hours, take it easy, and forfend heavy lifting (the gym)and bending over. Increased blood pressure can restart bleeding. Sleep with your head propped on two pillows. This helps reduce swelling.
Keep an eye out for warning signs (fever)pus, bleeding that doesn't stop after an hour of pressure, or pain that gets worse after day three. If any of these appear, call your dentist right away.
Most people feel ready to resume light work after about three days. Full activity (meaning your day-to-day life)takes about a week. But the bone fusing with the implant, osseointegration, takes 3 to 6 months.